Old content:
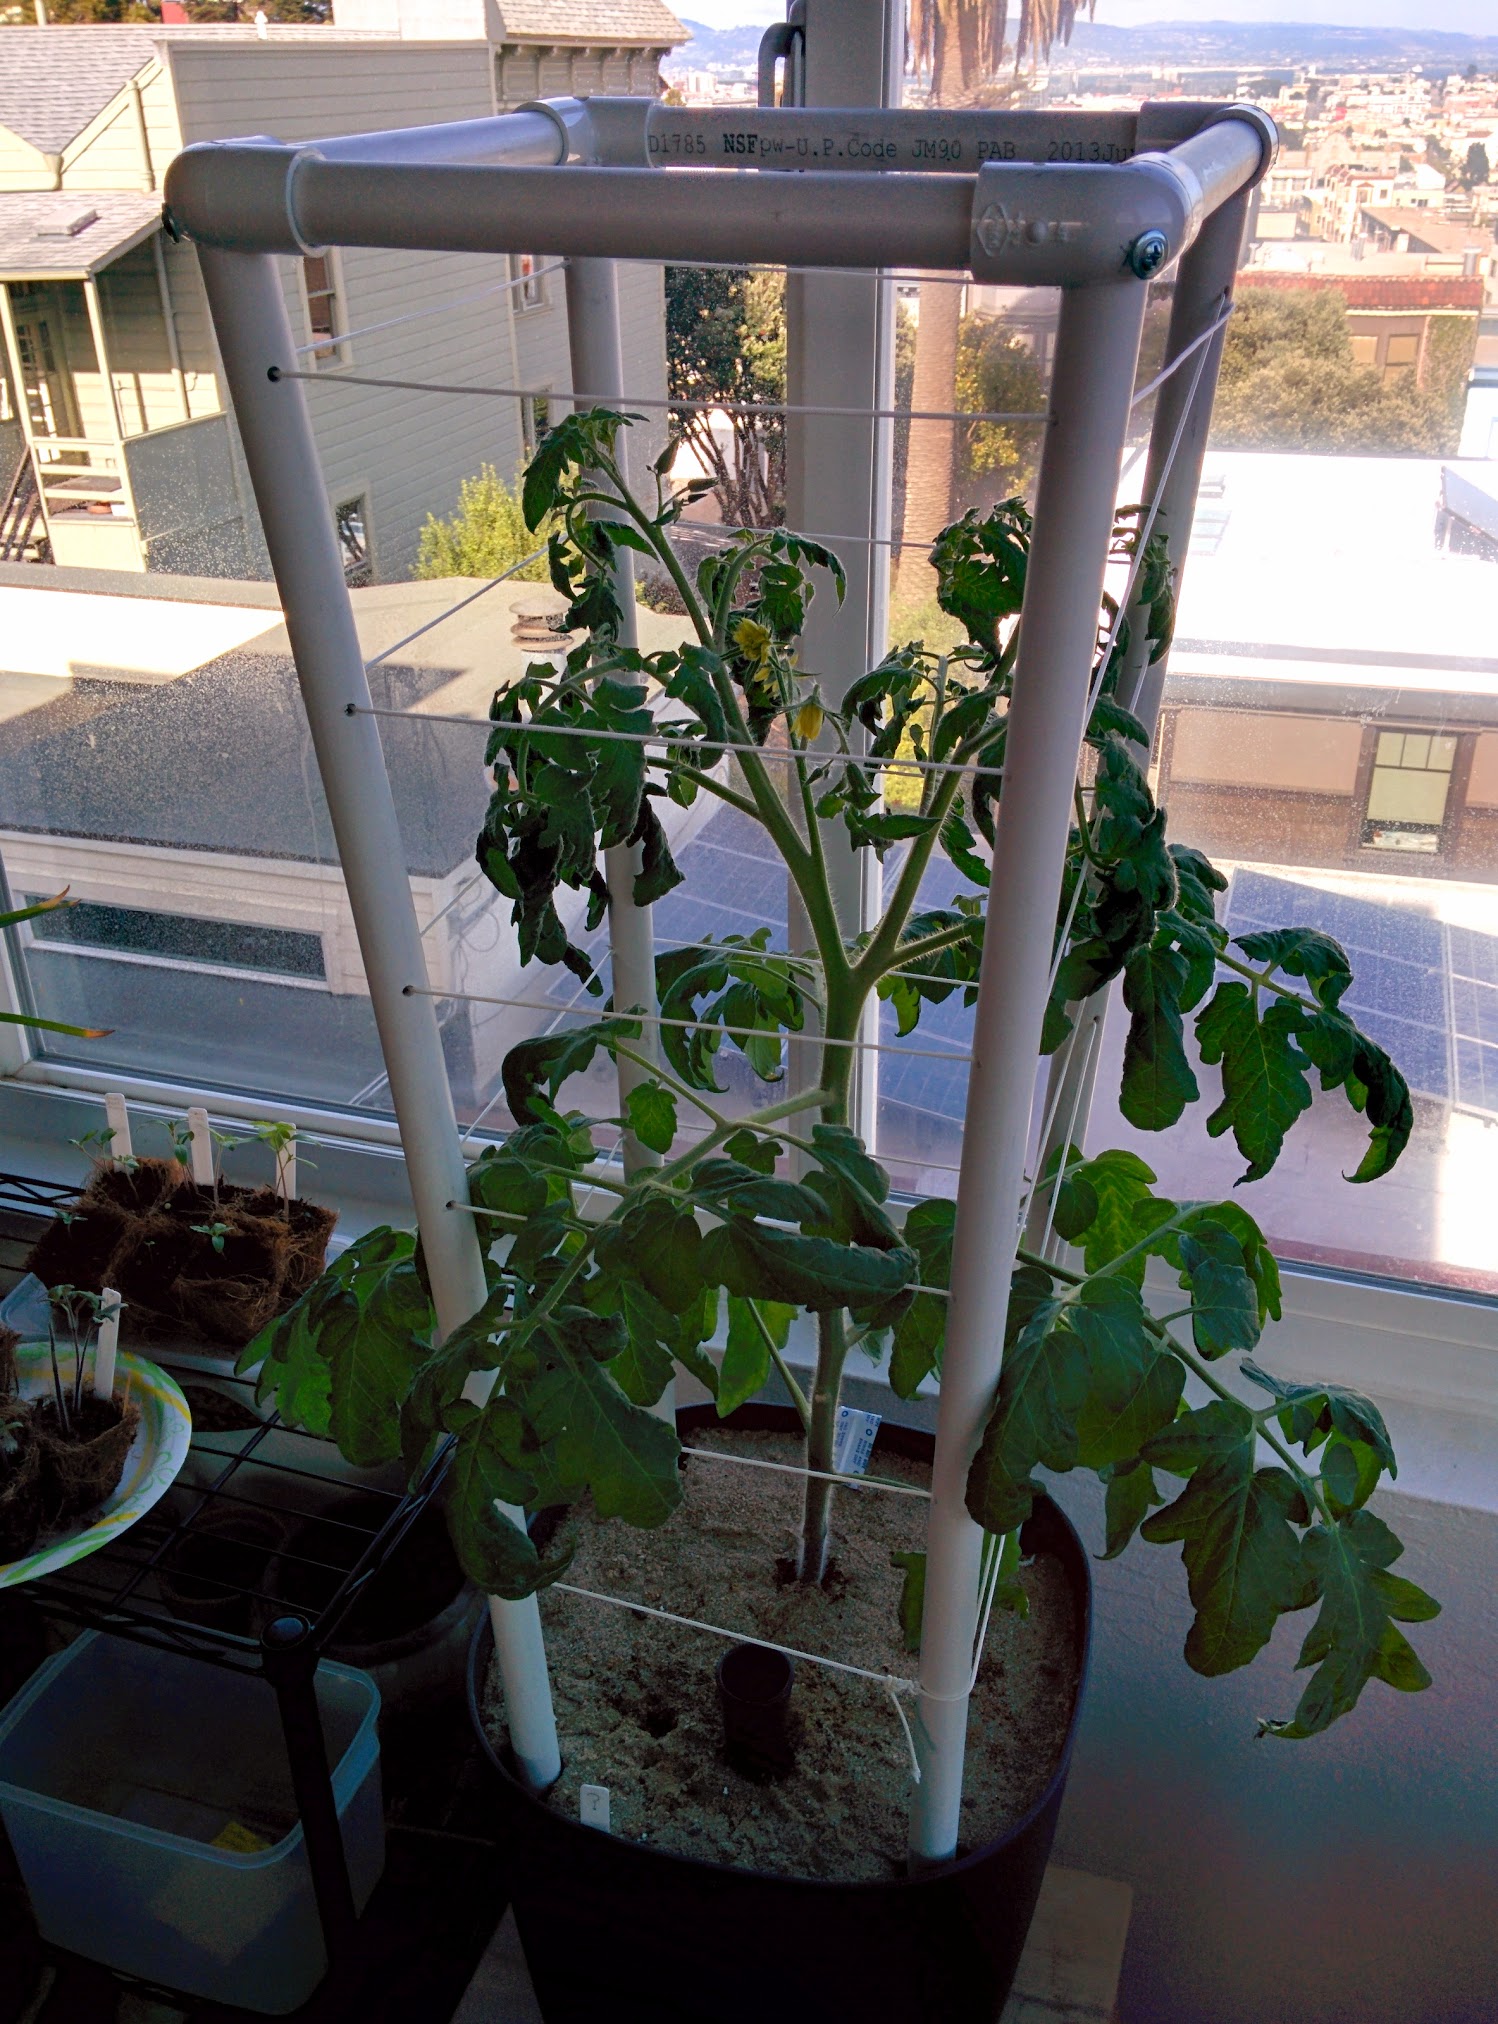
Last season I used a green rod for supporting the tomatoes in the indoor self-watering pots. They worked alright, until the tomatoes got large enough to pull the rod over, so I drilled holes through the top of the rod and anchored it to the pot on each side, and that worked okay…for a while, until the rod buckled.
After that I looked for a retail tomato cage that collapsed for storage, and was sturdy enough to handle some beefy plants with a footprint that fit inside of my pots (approximately 1 square foot). I found some that were strong and collapsible, but none had a small enough footprint for my pots, so I decided to make my own.
For each cage, you need the following:
Qty 4: 9″x1/2″ PVC (or the diameter of your pot and subtract 2-3″)
Qty 4: 48″x1/2″ PVC
Qty 4: 90° 1/2″ PVC elbows
Qty 4: 3/8″ screws
Twine or string
Tools required:
Drill & bits (approximately 1/8″ drill bit, larger is okay)
7/8″ hole saw
Cut the PVC pipe to length.
Starting at 2″ from the end of each of the 48″ sections of pipe, drill a hole completely through for the string to be threaded through. Then every 4″ continue drilling holes until you are within 10″ of the end and set aside. Maintain the drilled holes in a straight line.
Put each of the 9″ sections into the elbow joints to make a square. In the middle of each PVC joint, drill a pilot hole. Then using the hole saw, and using the pilot hole as a guide, drill until the hole saw is halfway through the joint, and the plastic bit separates from the joint so you have a nice hole to fit a section of PVC into.
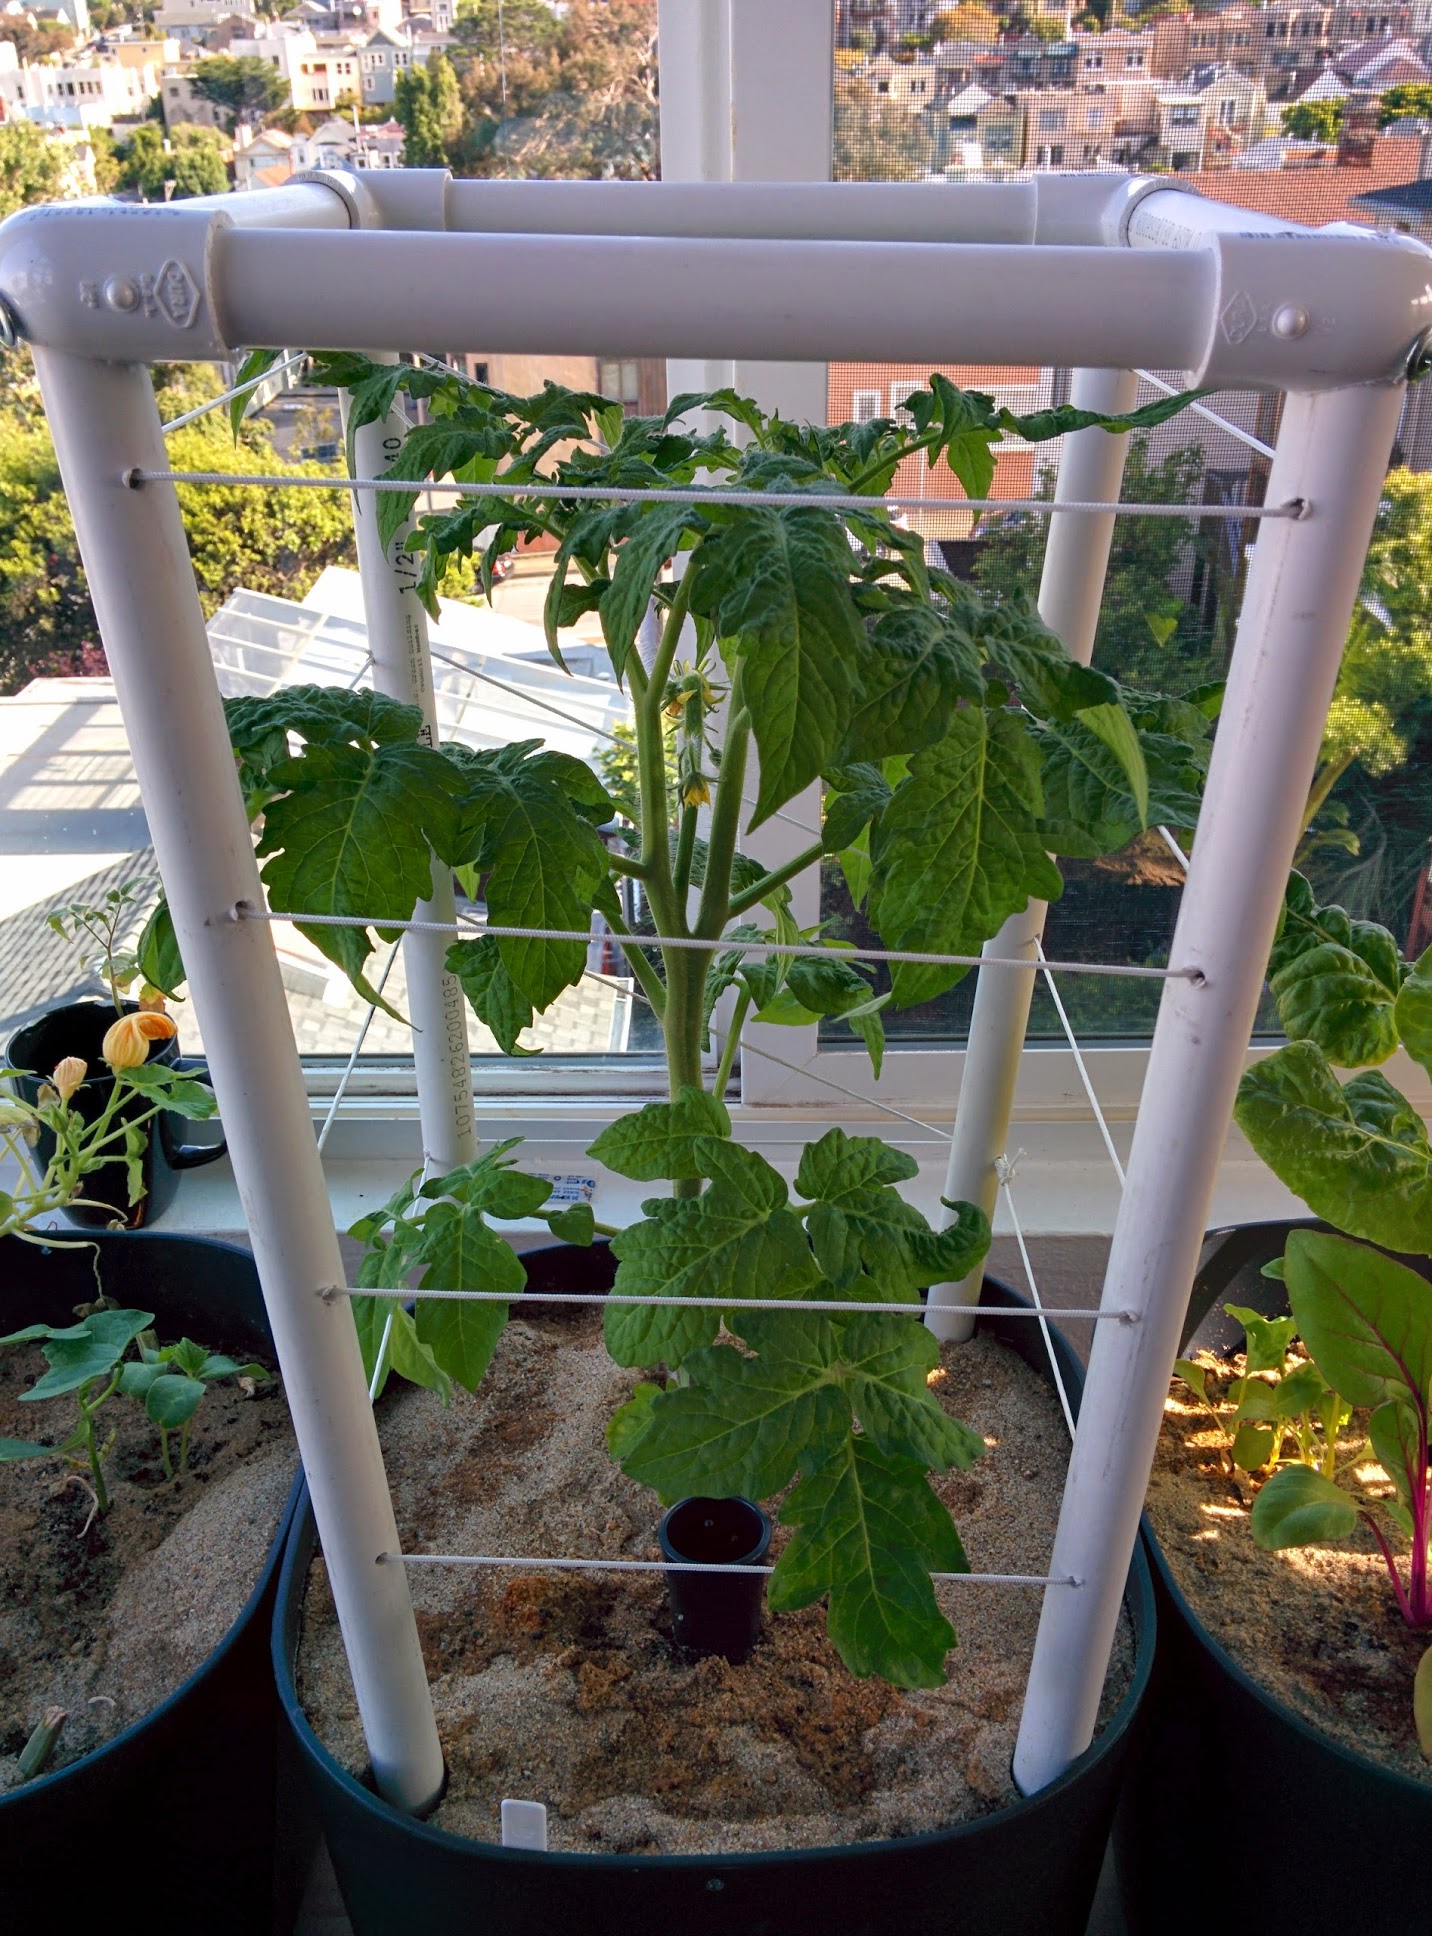
Put each of the longer lengths into your pot, and then put the square section on top, fitting each pipe into the holes you drilled. Secure the anchors into the square section by drilling the screw through the elbow joint into the anchor.
Finally, thread the string through each of the holes, from bottom to top as you see fit, making sure the tension will be supportive enough for your plant.
If your plant gets taller than expected you can remove the square section and add 12″ segments using straight PVC joints. Drill holes for the string to be threaded through at 2″, 6″ and 10″ and affix them to the anchors. Affix the square section to the top of the new anchors, and thread the string through the new section as before.
At the end of the season, remove the square section, then remove each anchor section, leaving the strings in place, and store collapsed.
For a shorter version for dwarf tomatoes, use a section of 36″ anchors instead of 48″.
Total cost is approximately $8 each. 12″ extensions are less than $2.